Memory Keeper
Exhibition: Visiting with Memory
Artist: Lindsay Bond
Overview
Lindsay Bond uses collective family memories and archives as the framework for her exhibition. An inherited box of family photographs and memorabilia inspired Lindsay to become a steward of these family memories and ask the question of herself, “How do I care for my family’s memories?”
Through our memories, we can recall past events and experiences. Photographs can play an important role in this recall of memories. Photographs are a visual means of seeing, communicating, recording and experiencing a moment in time. It can be looked upon in the future to understand one version of the past and provide us with details about a specific place, person and time.
In this activity, participants will construct a collaged cardboard memory box used to store and safe keep items and photographs of personal significance. Participants become stewards of the items in the box and are invoked to care for them so that they can be revisited in the future.
Objectives
Use fine motor skills to cut, glue and assemble
Learn to construct a 3 dimensional object from a 2 dimensional instructional pattern
Recall memories of personal significance
Personalize a 3 dimensional object using collage techniques
Materials
Cereal box
Ribbon or string
Pencil
Ruler
Scissors
Exacto blade or box cutter (for instructor use only)
Glue stick
Tape
Collage materials: magazines, coloured paper, paper and coloured drawing materials to create your own drawings

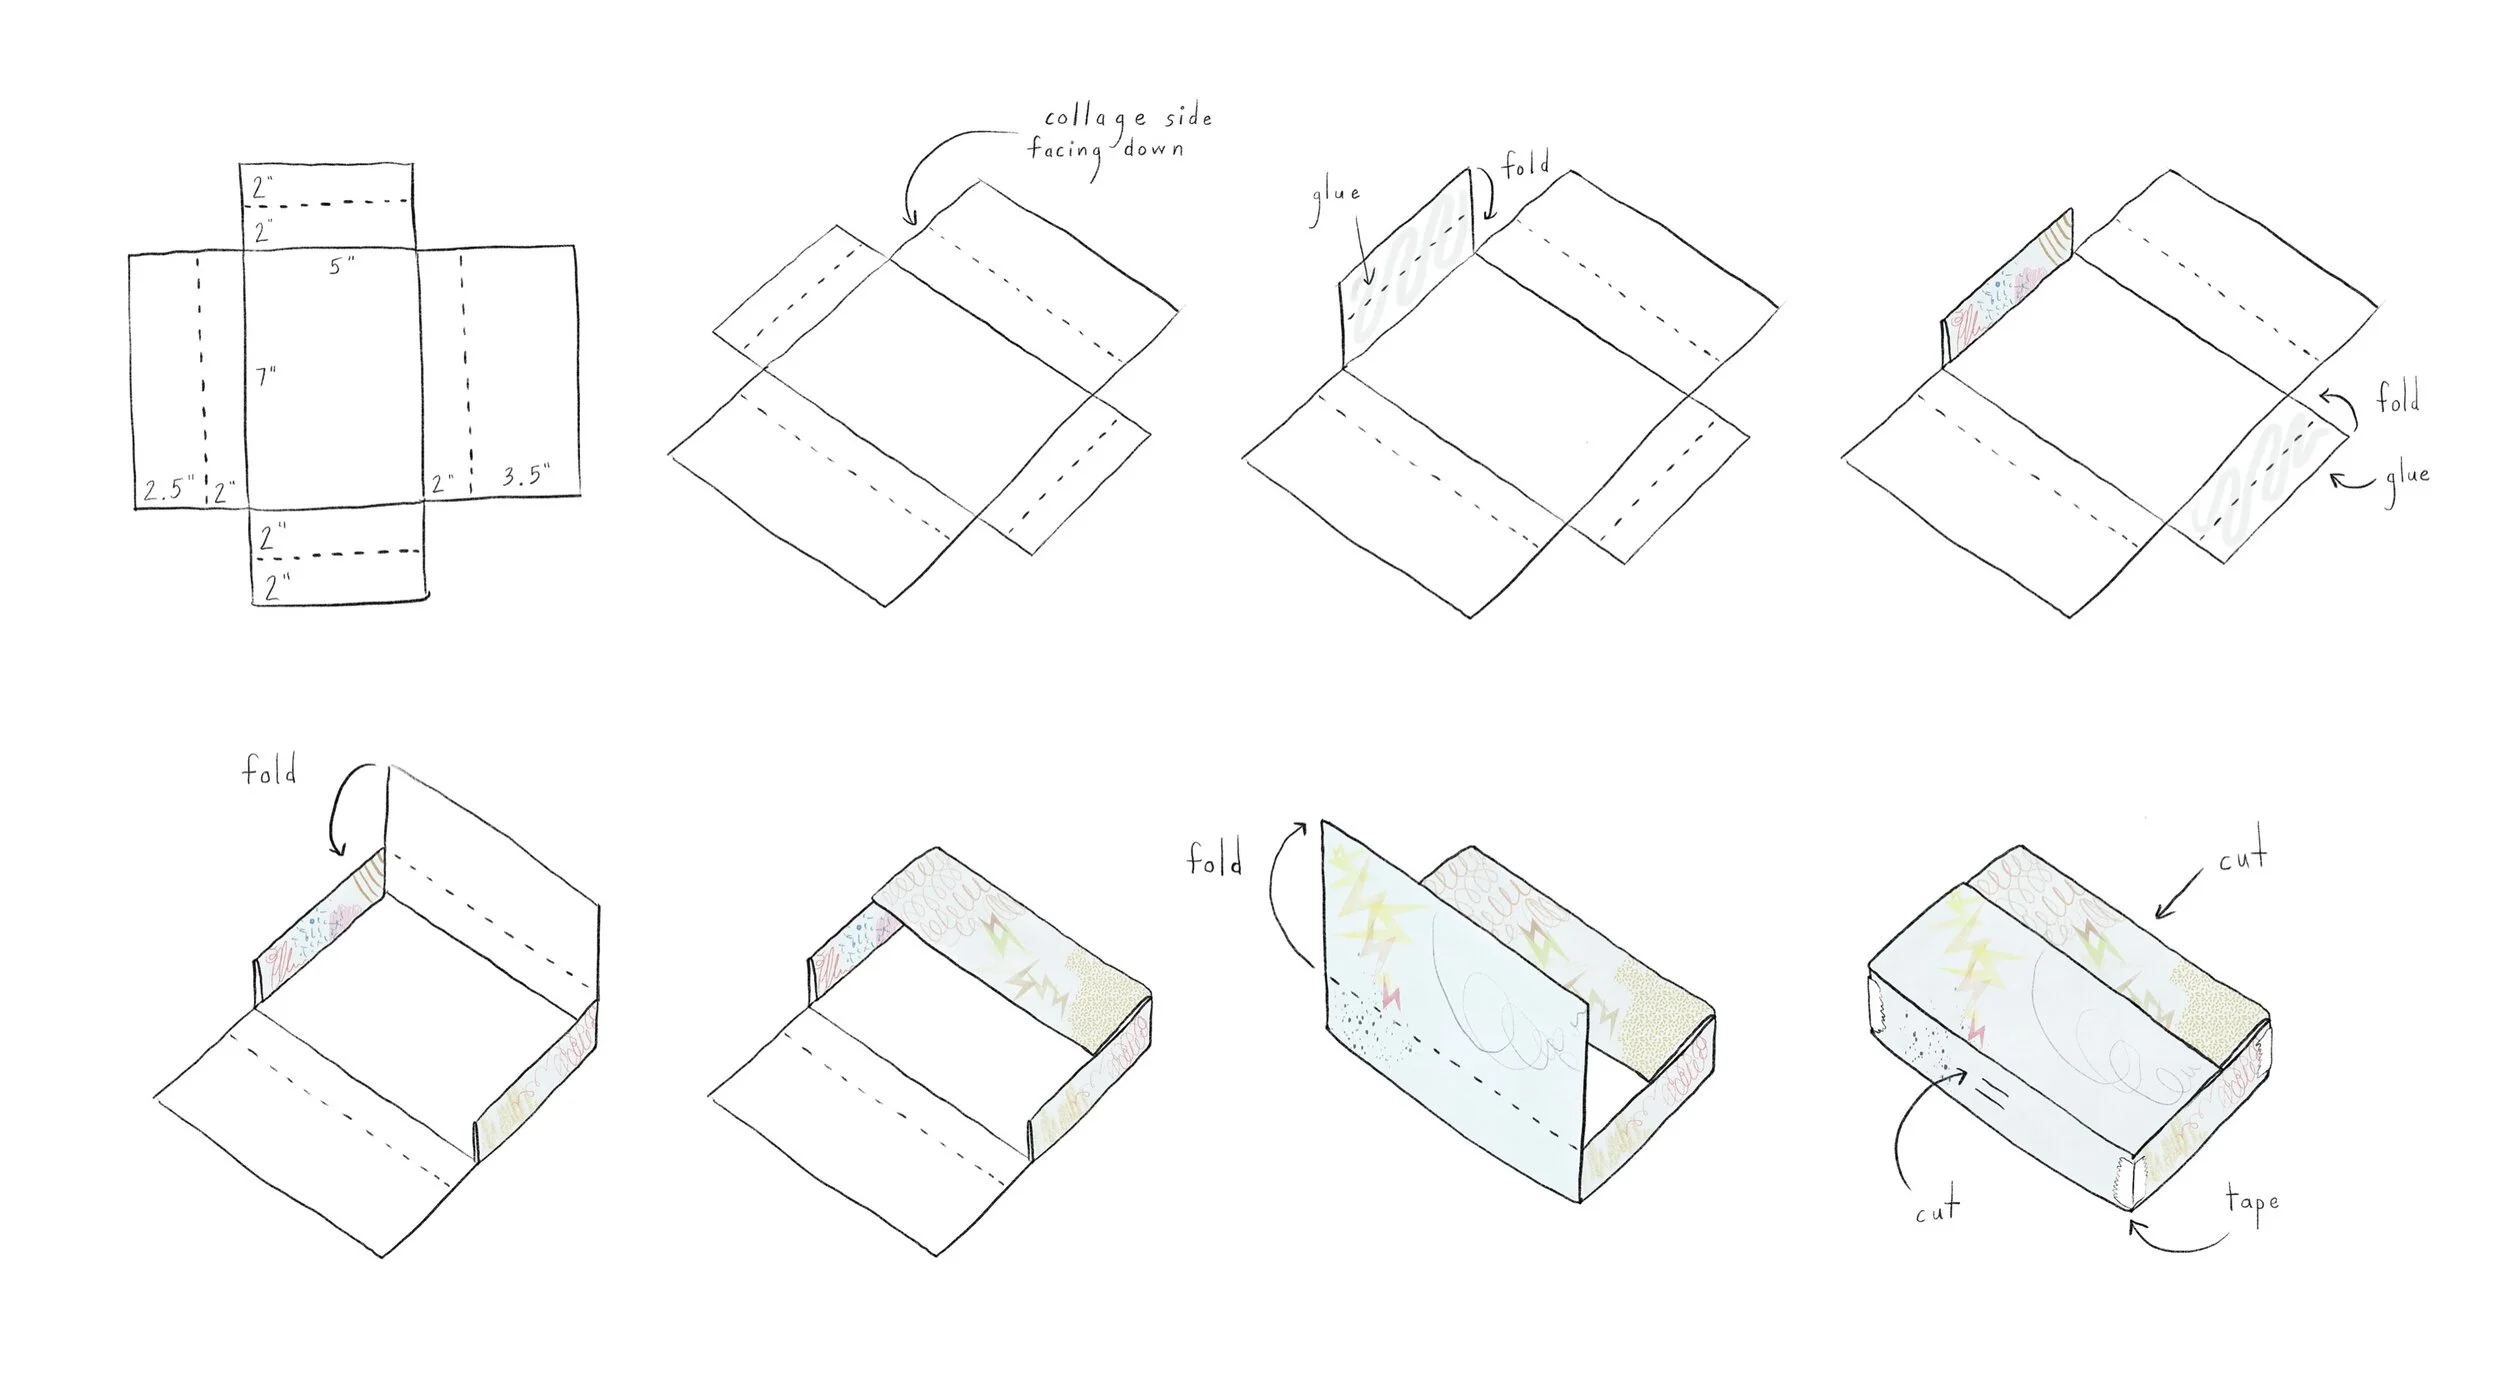
Instructions:
Step One
Open up the cereal box along the vertical (long) edge seam so that it lays flat. The printed side will become the exterior of the box so lay that side face down on the table. The inside of the cereal box should be facing up. Using the instructional drawings included as a guide, take a ruler and measure a 5 x 7 inch rectangle in the middle of the cardboard. Using a dotted line, draw a second rectangle around the first rectangle, leaving a distance of 2 inches in between the two lines. Draw another dotted line, keeping 2 inches away from the first dotted line. Working from the two shorter ends, draw extensions out measuring 2 inches. Working from the 2 longer ends, draw extensions out—one measuring 2.5 inches, the other 3.5 inches.
Note: Instructors can cut a master paper template out that students can use to trace. After tracing the template, measure and mark the dotted lines.
Step Two
Using scissors, cut along the outside perimeter of the drawn template. Flip the cardboard over so the printed side is up. Collect collage material by looking through magazines or recycled books for subject matter that has personal significance to you. You may also create your own drawings, poems or writing on paper. Begin cutting and gluing collage material until the printed side is fully covered.
Step Three
Flip the cardboard over so printed/collaged side is face down on the table.
Fold along the solid and dashed lines that were previously marked in the inside of the box. Crease all of the folds before we begin folding anything in to its final place. Use the ruler as a guide along the lines while folding. This will help keep the accuracy of the folds, making sure they follow the marked line.
Step Four
Place glue on the inside of the two shorter side extensions. Begin folding the box starting at the innermost lines on the side extensions. Fold towards the inside of the rectangle and create a 90 degree angle. Fold down along the first dotted line. The second dotted line should be lined up with the bottom edge. Press to adhere. Repeat with the remaining side extension.
Step Five
At this time, you may wish to line the inside of the box. Add more collage material or colour. It is also perfectly ok to leave the inside of the box as is.
Step Six
Fold the remaining two sides to create the box lid. At the first marked line, fold to create a 90 degree angle. Fold inwards along the dotted line to create the lid. Repeat for the remaining side. Tape each corner of the box to secure.
Step Seven
To be completed by the Instructor— using the exact knife, cut two 1 inch slits in the side of the lid panels as shown.
Run a ribbon or string through the slits and tie to secure the lid in place.