Designing Repeat Patterns
Exhibition: Visiting with Memory
Artist: Lindsay Bond
Overview
In the exhibition Visiting with Memory, Linsday Bond was inspired to create her own wallpaper pattern design by using imagery of personal significance. When observing our surrounding environments, we too can find creative use of patterns within both nature and man-made objects. Participants will observe and discuss found patterns in order to spark imagination and creativity in creating their own repeat pattern design.
Objectives
Develop visual pattern recognition skills by observing patterns in everyday surroundings
Identify the form and structure of different pattern types
Learn to compose their own visual pattern
Use personal experience and surroundings to inspire an idea
Use fine motor-skills and critical thinking in designing a repeat pattern
Materials
Paper 8.5 x 11
Pencil and eraser
Colouring materials of your choice; pencil crayons or markers
Scissors
Tape
Photocopier (or scanner; if older participants have computer accessibility)
Coloured paper (for variation with younger participants)
Instructions:
Step One
Prior to completing the hands-on portion of this project, spend time observing where repeat patterns can be found in our everyday lives. While examining these visual patterns, we can learn to identify the changes that are creating the pattern such as; changes in shapes, rotation, changes in size, changes in colour and/or vertical or horizontal translation. We can also observe different imagery used such as geometric, floral or other various themes. Some specific examples of endless repeat pattern design can be observed in wallpaper, wrapping paper, floor tiles, and numerous textiles such as clothing, bedding and upholstery. Examine Lindsay Bond’s wallpaper and see if you can identify where the repeat begins and ends.
Step Two
Using a sheet of paper 8.5 x 11 and a pencil, draw a design in the centre of the paper. Make sure the design does not touch any edge of the paper. Once you have penciled the design in, complete it using coloured markers or coloured pencils. Note: Older participants may create a more complex design while younger participants may choose just a single shape, like a star.
Step Three
Fold the piece of paper in half vertically to create a crease, then unfold. Using scissors, follow the crease and cut the drawing into two equal halves. Switch the two pieces of the drawing so that the piece that was originally on the left, is now on the right and vice versa.
Step Four
Using tape, connect the two pieces of paper together in their new position making sure that they are carefully aligned. Make sure to flip the paper over and tape the design from the back so that the tape doesn’t interfere with the surface design.
Step Five
Take the paper and fold it in half horizontally to create a new crease, then unfold. Using scissors, follow the crease and cut your drawing in half again, this time horizontally. Switch the position of the two pieces of paper and put the piece that was originally on the bottom, on the top.
Step Six
Align pieces carefully and tape, connecting the two pieces of paper together in their new position. Remember to place the tape on the backside of the paper, not the front.
Step Seven
Flip the paper back over with the design facing up. There will now be a big blank space in the middle of the paper that can be filled in with another design. With the same process as earlier, use the pencil first and then complete using coloured materials. It is very important that you do not draw to the edges of the paper or the repeat pattern will not work.
Step Eight
Photocopy the completed design to a minimum of 5 copies. Including the original, there should be 6 copies in total. Lay the copies side by side to create the repeat design and tape together. Note: If there is no access to a colour copier, make 6 black and white copies and set the original aside.
At this stage you may also create the repeat pattern using a computer. Scan the completed design and use a program that allows you to copy and paste the scanned image, such as Word. You may choose to change the scale of the image to alter the look of the overall repeat pattern. Align multiple copies side by side in rows and columns to create the pattern.


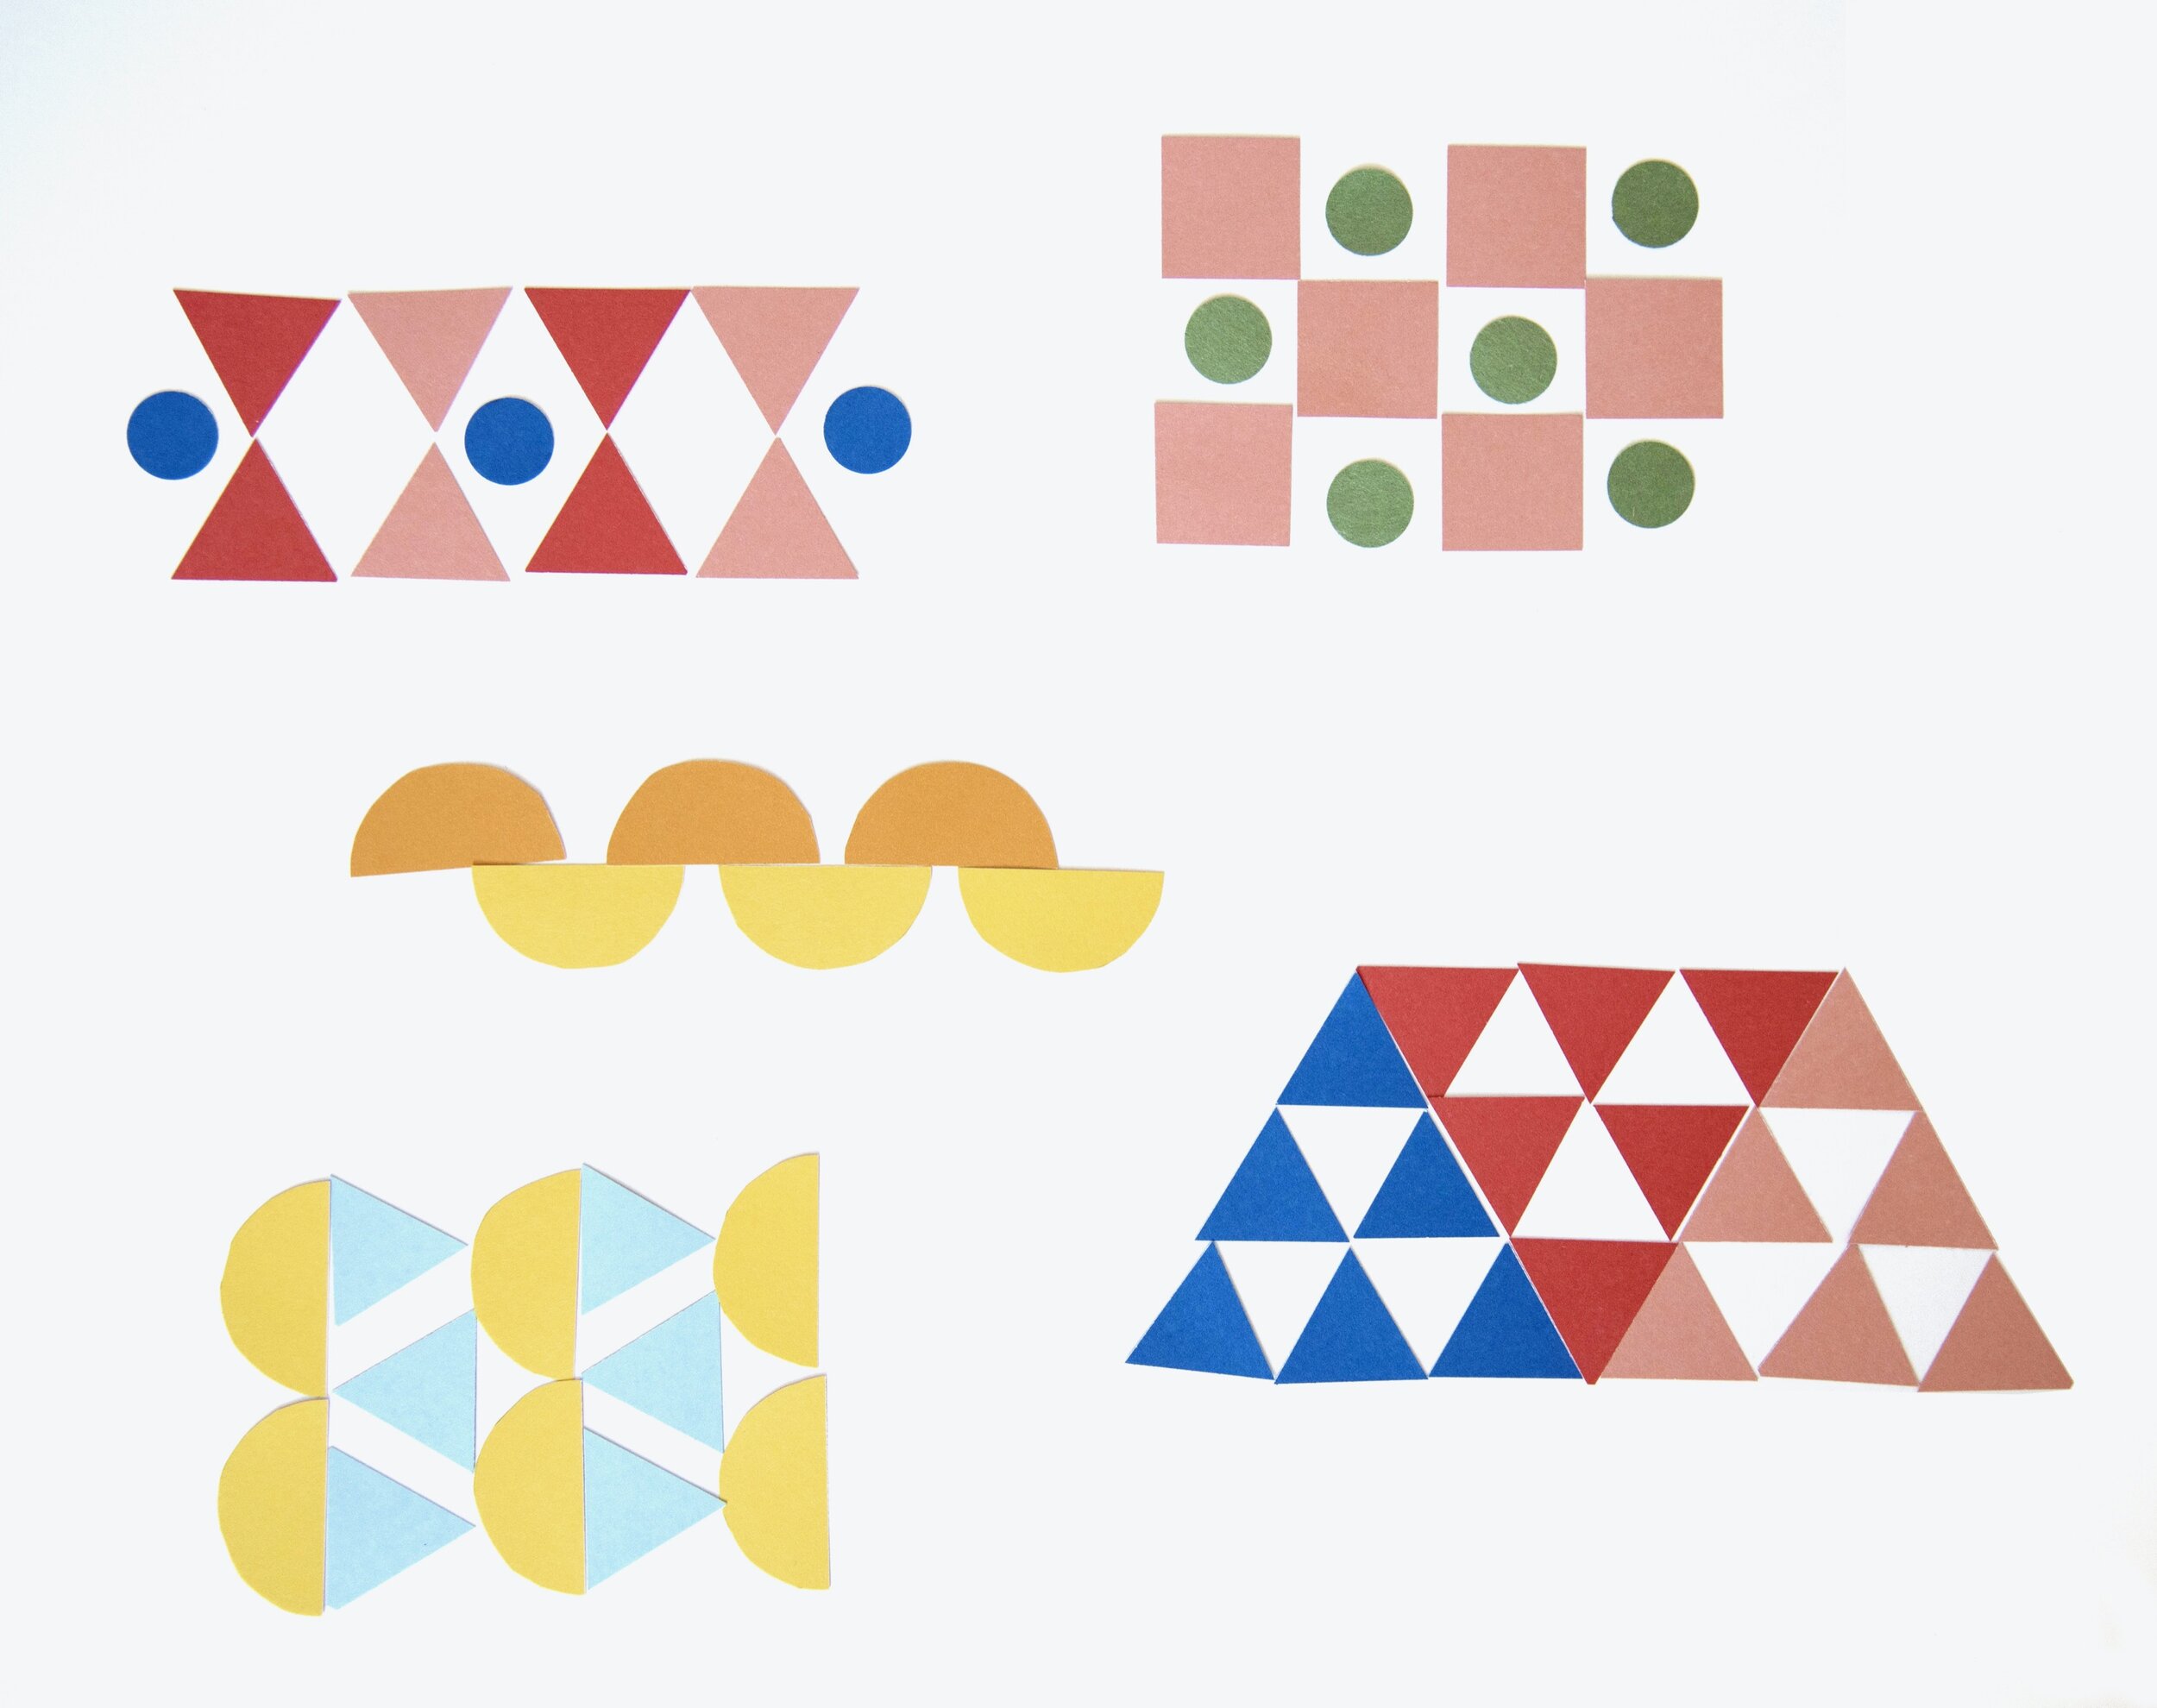
Variations
Older Participants can be encouraged to research and develop a pattern inspired by personal significance. Have them journey through their memories and everyday life to identify an object of significance that can be used within their pattern. They may be inspired by a found pattern, or perhaps an object or motif that they can replicate in order to create their pattern.
For Younger Participants:
Pre-make a number of loose paper tiles that the participants can rearrange to create repeating patterns. To create the paper tiles, use a variety of different shapes and colours in variations inspired by the examples shown. You can cut shapes out of coloured paper as well as draw patterned tiles. If you are creating your own paper tile designs, draw them on a master sheet and copy to create multiples. Group paper tiles and create different pattern stations that the participants can explore and rearrange to create their own patterns. This variation can easily be tailored to fit an age group. Younger participants can create simple AB patterns while older participants can make them more complex by including more variables; playing with shape, orientation, creative placement and repeating on both x and y axis.